教程索引目录请访问:《大数据技术入门级系列教程》
上一篇我们已经可以通过编程的方式操作 Zookeeper 了,并且学到了 Zookeeper 注册与监听,那么就来小试牛刀体验一把,本文将带你实践体验一个简单的小案例,监听节点的变化。
编写一个假设的服务器
我们先写一个假设的服务器,他会向 Zookeeper 注册他已经上线了,因为要注册多台这样的”服务器“,所以服务器名称我们使用 main 启动传参的方式传递,代码如下:
public class DistributeDemo {
    private static final String CONNECT_STRING = "localhost:2181";
    private static final int SESSION_TIMEOUT = 2000;
    private static final String PARENT_NODE = "/servers";
    /**
     * 服务器端向Zookeeper注册
     */
    public static class DistributeServer {
        private ZooKeeper zkClient = null;
        // 创建到zk的客户端连接
        public void getConnect() throws IOException {
            zkClient = new ZooKeeper(CONNECT_STRING, SESSION_TIMEOUT, event -> System.out.println("DistributeServer默认的回调函数"));
        }
        // 注册服务器
        public void registServer(String hostname) throws Exception {
            String create = zkClient.create(PARENT_NODE + "/server", hostname.getBytes(), Ids.OPEN_ACL_UNSAFE, CreateMode.EPHEMERAL_SEQUENTIAL);
            System.out.println(hostname + " is online " + create);
        }
        // 业务功能
        public void business(String hostname) throws Exception {
            System.out.println(hostname + " is working ...");
            Thread.sleep(Long.MAX_VALUE);
        }
        public static void main(String[] args) throws Exception {
            // 获取zk连接
            DistributeServer server = new DistributeServer();
            server.getConnect();
            Stat stat = server.zkClient.exists("/servers", false);
            if (stat == null) {
                server.zkClient.create("/servers", "".getBytes(), ZooDefs.Ids.OPEN_ACL_UNSAFE, CreateMode.PERSISTENT);
            }
            // 利用zk连接注册服务器信息,因为要注册多个服务器,所以使用参数的方式,我们可以调用多次
            server.registServer(args[0]);
            // 启动业务功能
            server.business(args[0]);
        }
    }
}
编写一个假设的客户端
上面有了服务器的上线,咱们再写个客户端去监听服务器的上线情况,代码如下:
public class DistributeDemo {
private static final String CONNECT_STRING = "localhost:2181";
private static final int SESSION_TIMEOUT = 2000;
private static final String PARENT_NODE = "/servers";
public static class DistributeClient {
private ZooKeeper zk = null;
// 创建到zk的客户端连接
public void getConnect() throws IOException {
zk = new ZooKeeper(CONNECT_STRING, SESSION_TIMEOUT, event -> {
// 再次启动监听
try {
getServerList();
} catch (Exception e) {
e.printStackTrace();
}
});
}
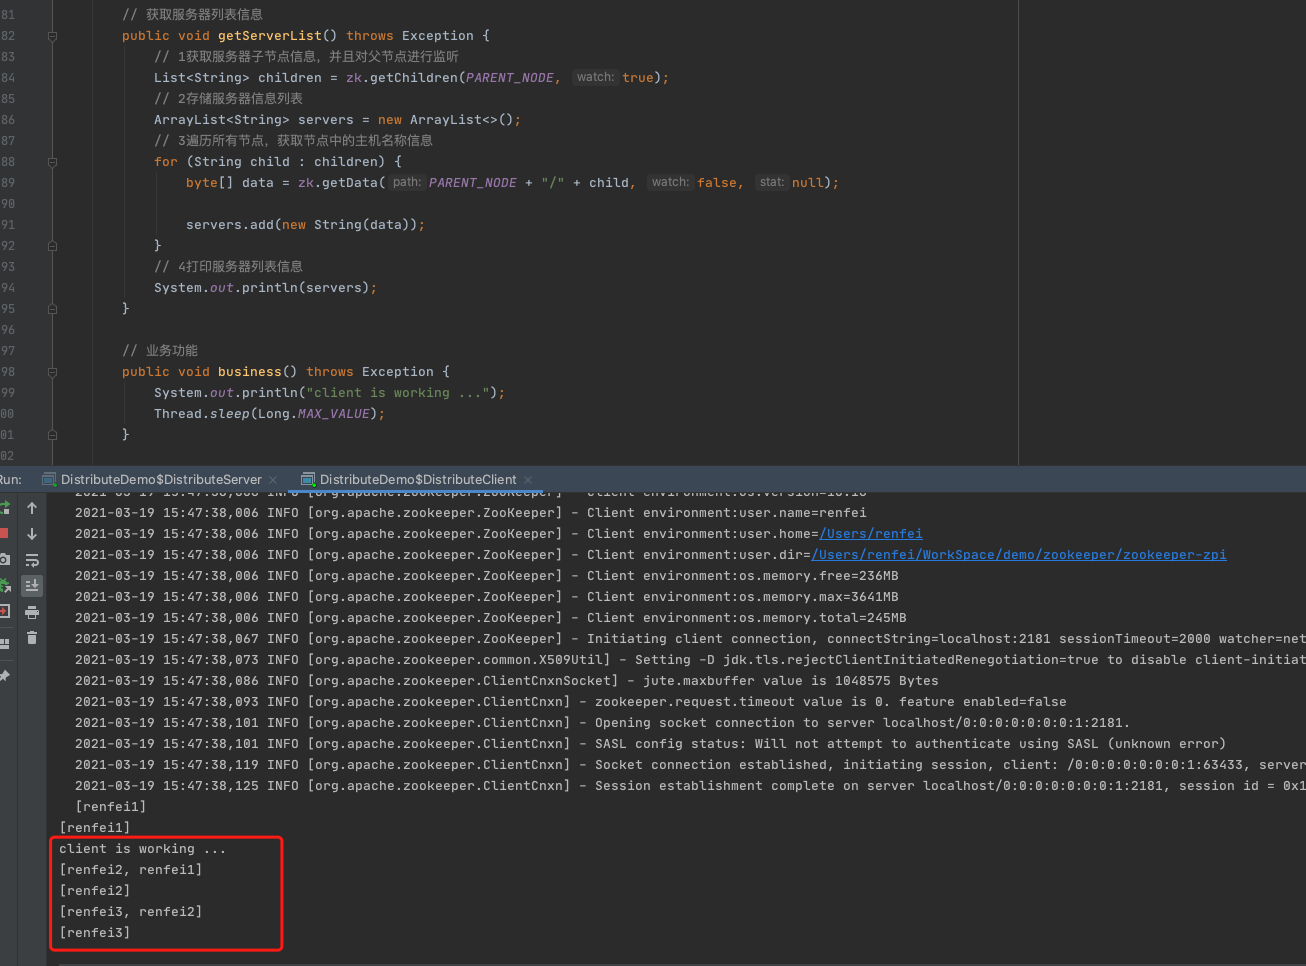
// 获取服务器列表信息
public void getServerList() throws Exception {
// 1获取服务器子节点信息,并且对父节点进行监听
List<String> children = zk.getChildren(PARENT_NODE, true);
// 2存储服务器信息列表
ArrayList<String> servers = new ArrayList<>();
// 3遍历所有节点,获取节点中的主机名称信息
for (String child : children) {
byte[] data = zk.getData(PARENT_NODE + "/" + child, false, null);
servers.add(new String(data));
}
// 4打印服务器列表信息
System.out.println(servers);
}
// 业务功能
public void business() throws Exception {
System.out.println("client is working ...");
Thread.sleep(Long.MAX_VALUE);
}
public static void main(String[] args) throws Exception {
// 1获取zk连接
DistributeClient client = new DistributeClient();
client.getConnect();
// 2获取servers的子节点信息,从中获取服务器信息列表
client.getServerList();
// 3业务进程启动
client.business();
}
}
}启动我们的案例
我们先启动服务器的案例,由于参数使用 main 参数传递,我们需要先改一下启动配置,给程序传参进来:
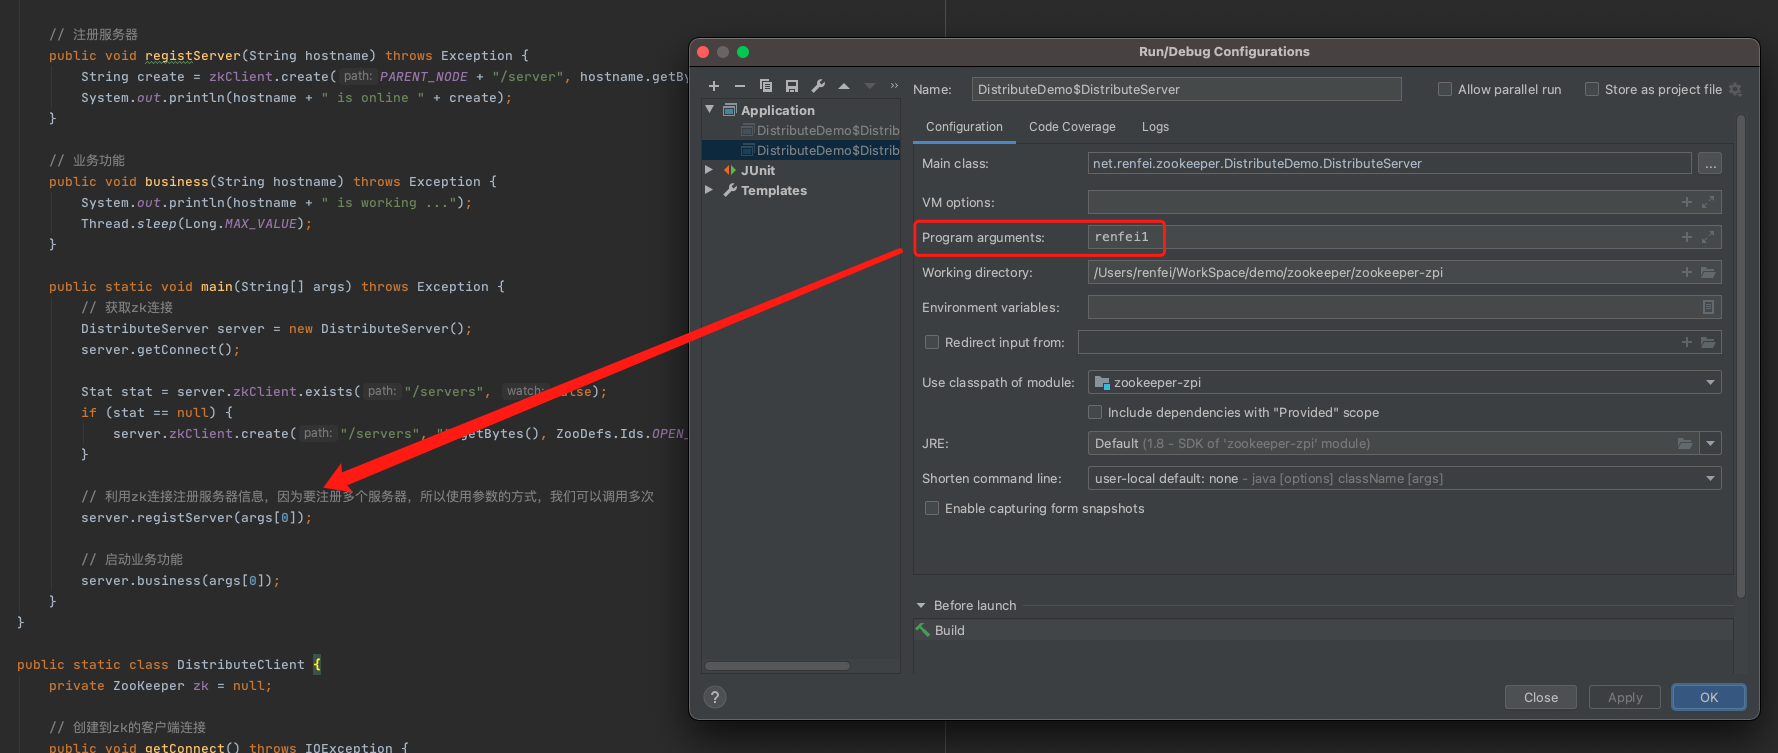
然后启动我们的监听客户端,就可以监听服务器的上线情况了。我们可以再启动一个服务器,改下启动参数名,多启动几个,看看客户端是不是已经可以监听到新服务器的上线情况了: