

Tutorial index: Big Data for Beginners: tutorial series
Last time we tried installing a pseudo-distributed setup, but what you actually use in production is a distributed cluster — that’s the real point. This post builds a minimal Hadoop cluster on three nodes to experience a fully distributed environment.
Prerequisites
This post is about Hadoop only, so I won’t re-explain Linux topics. You need to be comfortable in Linux, install and configure Hadoop following the earlier tutorials, and have at least 3 Linux machines ready for experimentation. Besides the previous tutorials, by this point I’ve also configured SSH key-based passwordless login across the 3 machines so they can reach each other without passwords. Set that up yourself; I’ll skip it here.
Cluster Design
Cluster size should be odd, so the minimum is 3: allowed sizes are 3, 5, 7, 9 — never even. That’s for the leader election algorithm, which I won’t belabor here; let’s stick to Hadoop.
We need the following roles in the cluster: NameNode, SecondaryNameNode, DataNode, ResourceManager. NodeManager runs alongside DataNode. Here’s how I distribute them over three nodes:
- n1.renfei.net: NameNode, DataNode, ResourceManager
- n2.renfei.net: SecondaryNameNode, DataNode, NodeManager
- n3.renfei.net: DataNode, NodeManager
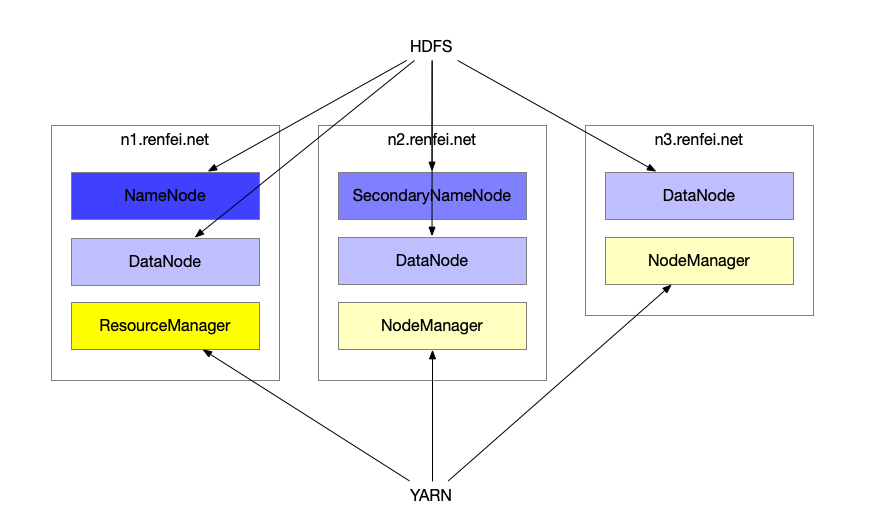
The hostnames can be set up through /etc/hosts. So n1.renfei.net mainly handles HDFS, n2.renfei.net mainly handles Yarn, and all three handle storage — as the diagram shows.
Editing the Configuration
The config file changes below are identical on all three machines, so I’ll write them once. Set JAVA_HOME in the env.sh files to match your own paths; in my case I extracted the JDK to /opt/module/jdk1.8.0_281.
core-site.xml
<!-- The NameNode address in HDFS -->
<property>
    <name>fs.defaultFS</name>
    <value>hdfs://n1.renfei.net:9000</value>
</property>
<!-- Storage directory for files generated while Hadoop runs -->
<property>
    <name>hadoop.tmp.dir</name>
    <value>/opt/module/hadoop-2.10.1/data/tmp</value>
</property>
Here we specify which node is the NameNode, plus where runtime files go.
hadoop-env.sh and hdfs-site.xml
Set JAVA_HOME in hadoop-env.sh to your own path, then configure hdfs-site.xml:
<property>
    <name>dfs.replication</name>
    <value>3</value>
</property>
<!-- Secondary NameNode host configuration -->
<property>
    <name>dfs.namenode.secondary.http-address</name>
    <value>n2.renfei.net:50090</value>
</property>
We set dfs.replication = 3, which is the replica count — how many copies of a file to keep. With 3, the file is replicated to three nodes for redundancy.
yarn-env.sh and yarn-site.xml
<!-- How the Reducer obtains data -->
<property>
    <name>yarn.nodemanager.aux-services</name>
    <value>mapreduce_shuffle</value>
</property>
<!-- Address of YARN's ResourceManager -->
<property>
    <name>yarn.resourcemanager.hostname</name>
    <value>n1.renfei.net</value>
</property>
<!-- Enable log aggregation -->
<property>
    <name>yarn.log-aggregation-enable</name>
    <value>true</value>
</property>
<!-- Keep logs for 7 days -->
<property>
    <name>yarn.log-aggregation.retain-seconds</name>
    <value>604800</value>
</property>
mapred-env.sh and mapred-site.xml
Set JAVA_HOME in mapred-env.sh to your own path, then configure mapred-site.xml.
Copy mapred-site.xml.template to mapred-site.xml:
<!-- Run MapReduce on Yarn -->
<property>
    <name>mapreduce.framework.name</name>
    <value>yarn</value>
</property>
<!-- History server address -->
<property>
    <name>mapreduce.jobhistory.address</name>
    <value>n1.renfei.net:10020</value>
</property>
<!-- History server web address -->
<property>
    <name>mapreduce.jobhistory.webapp.address</name>
    <value>n1.renfei.net:19888</value>
</property>
slaves
Configure /opt/module/hadoop-2.10.1/etc/hadoop/slaves and list all our nodes:
n1.renfei.net
n2.renfei.net
n3.renfei.net
Note: no trailing spaces at the end of lines, and no blank lines.
Starting the Cluster
Starting the whole cluster from n1.renfei.net requires SSH key-based passwordless login, so configure that first.
If this is the first time the cluster starts, you need to format the NameNode (before formatting, be sure to stop all namenode and datanode processes left over from the last start, and delete the data and log directories). The format command was covered last post — go review it.
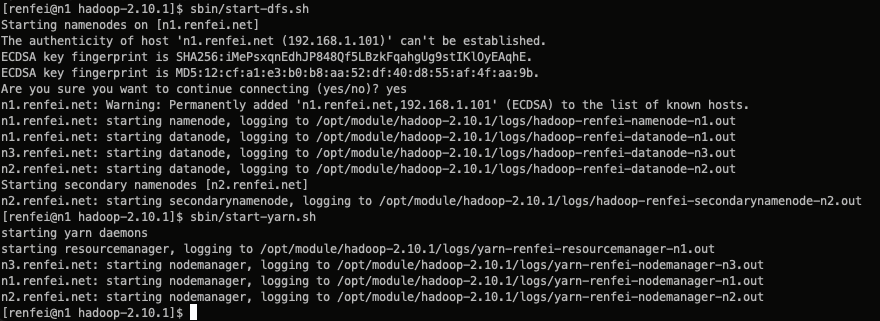
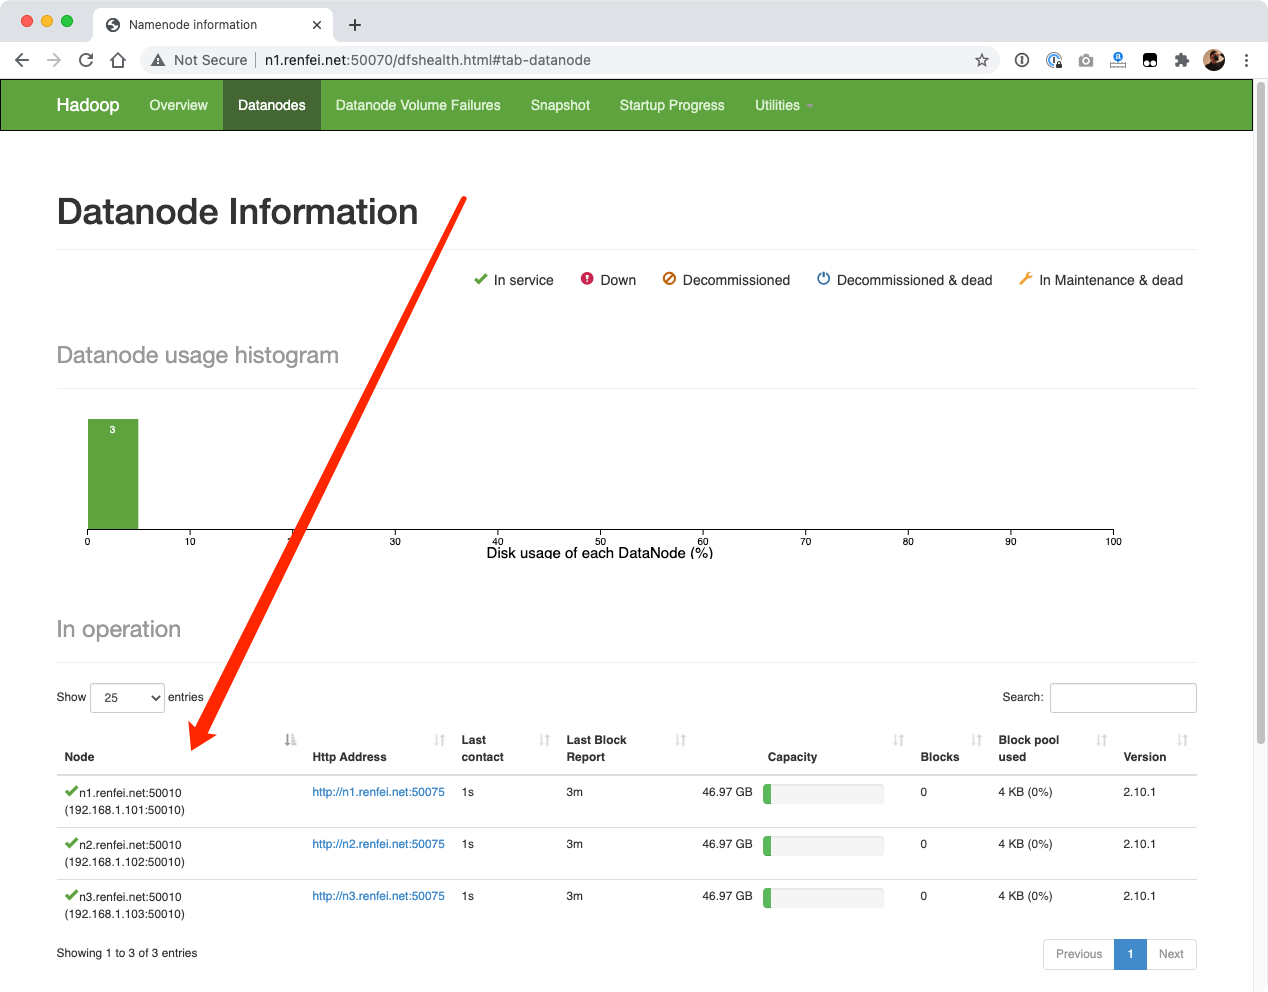
sbin/start-dfs.sh
sbin/start-yarn.sh
Note: if the NameNode and ResourceManager aren’t on the same machine, you must not start YARN on the NameNode — start YARN on the machine hosting the ResourceManager.
Testing the Cluster
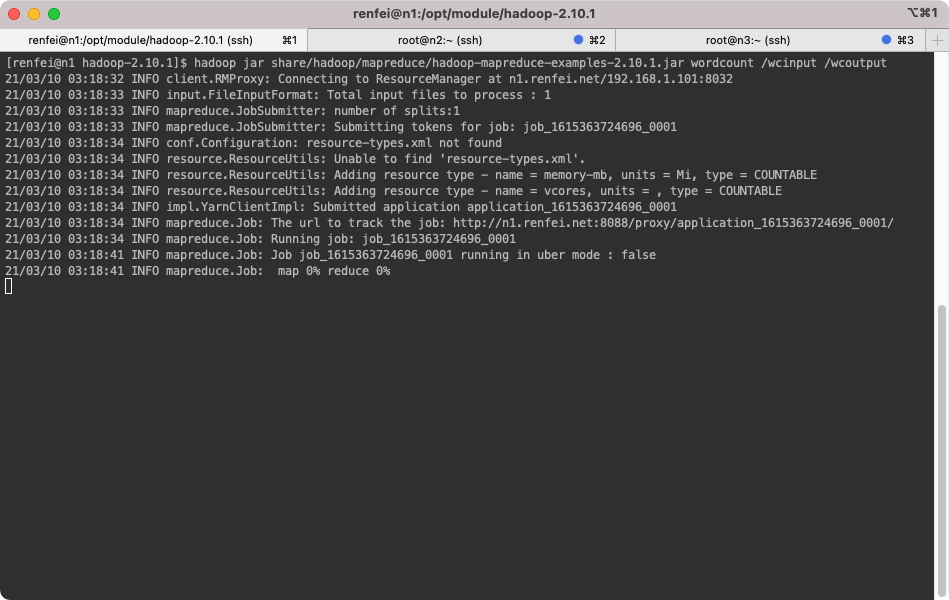
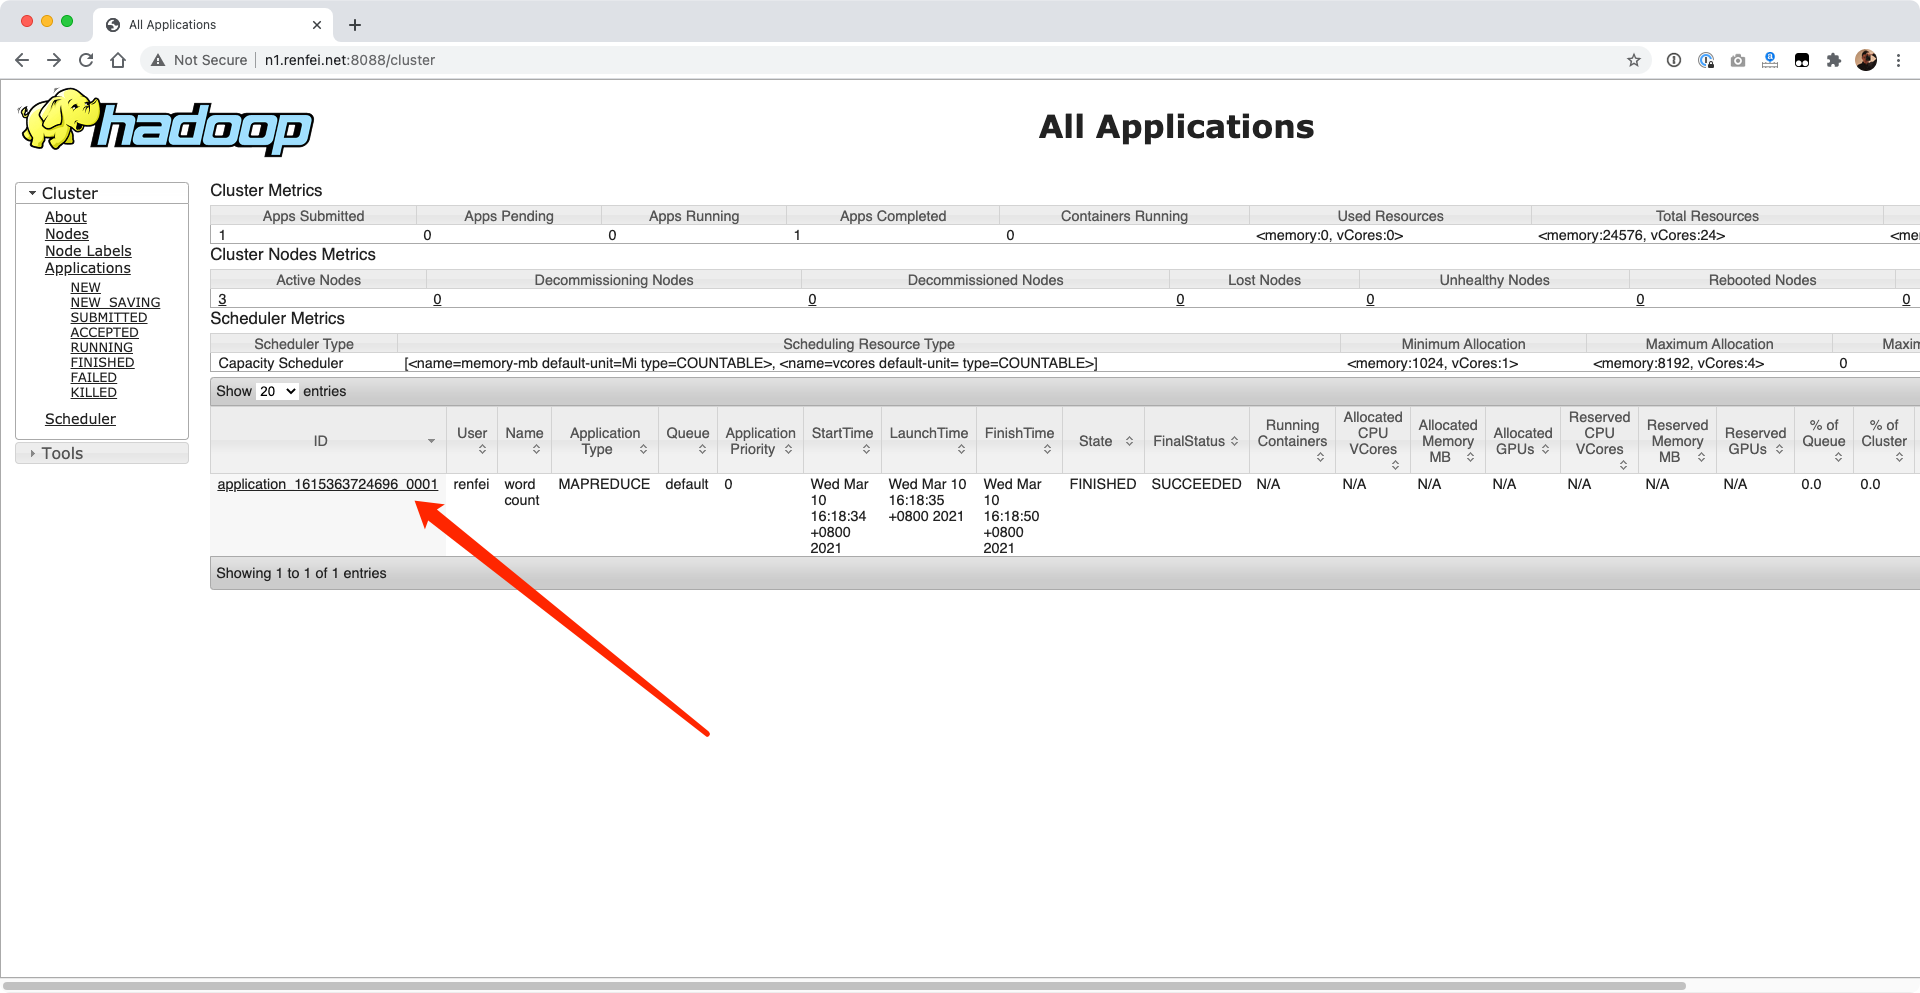
Last post we ran the WordCount example in pseudo-distributed mode; let’s use WordCount again to test the cluster. If you don’t know how to run it, review the previous post.
Wrapping Up
You now have a Hadoop cluster of your own. Next we’ll shift focus to the core of Hadoop: HDFS and MapReduce.