

The code in this article is already implemented and open-sourced: Webmaster Push Tool Released and Open-Sourced, Supporting Proactive Pushing to Baidu/Bing/Google Search Engines
Google, the world’s number one search engine, has long supported webmasters proactively pushing pages, but not through a visual interface for ordinary users — it is done via a programming API. Many webmasters are not professional developers, and because Google requires verifying site ownership, I cannot simply build a visual interface where webmasters enter their own keys. So I wrapped Google’s API in a secondary layer to lower the difficulty of using it.
Source code project address: https://github.com/NeilRen/GoogleIndexing
Requirements
First, I built the wrapper on the Java platform with JDK 1.8. Programs in other languages may need a middleware layer to connect, which is worse than implementing it yourself; there is nothing I can do for those using other languages, since there are just too many programming languages out there.
Second, Google’s Indexing API is inaccessible from mainland China, so the program must run in a network environment that can reach Google.
Prerequisites
First, you need a Google account. Your project is in Java, with JDK 1.8 or above.
Creating a Google API Project
Because Google has updated its user flow, this section of the tutorial is outdated. For an updated supplement at this step, please refer to: Updates to the Google Indexing Push API Tutorial
Then, before sending a request to the Indexing API, you need to tell Google about your client and enable access to the Indexing API. Google provides a setup wizard that walks you through creating a project in the Google API Console, enabling the Indexing API, and creating credentials.
First, follow the wizard to create a project.
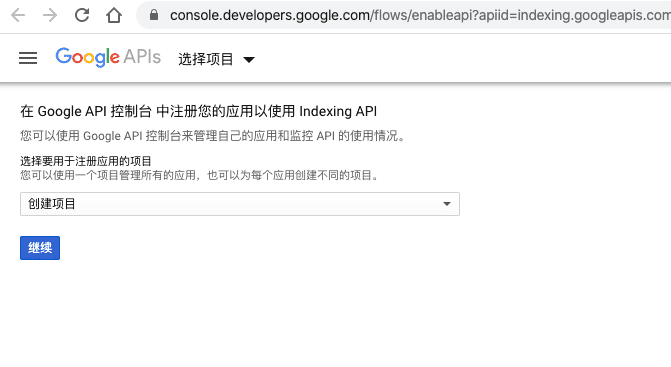
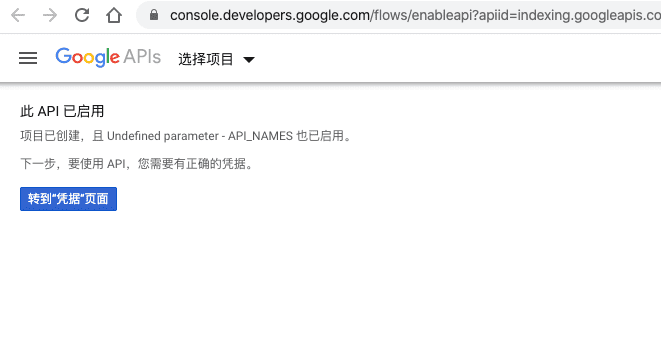
Then go to Credentials and add a credential.
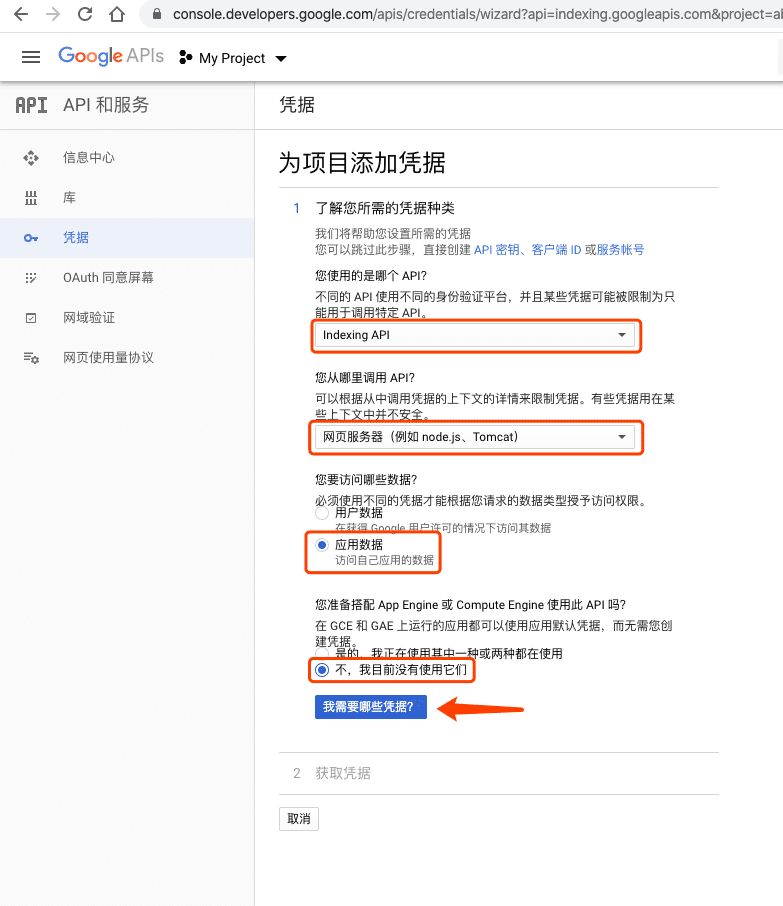
For the credential, choose Indexing API and Web server (e.g. node.js, Tomcat), select Application data, click “What credentials do I need?” to go to the next page.
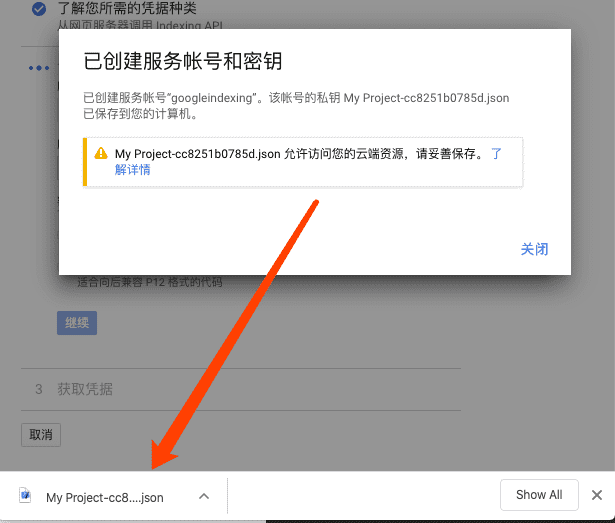
Create a service account; you can name it whatever you like. For key type choose JSON, then click Continue.
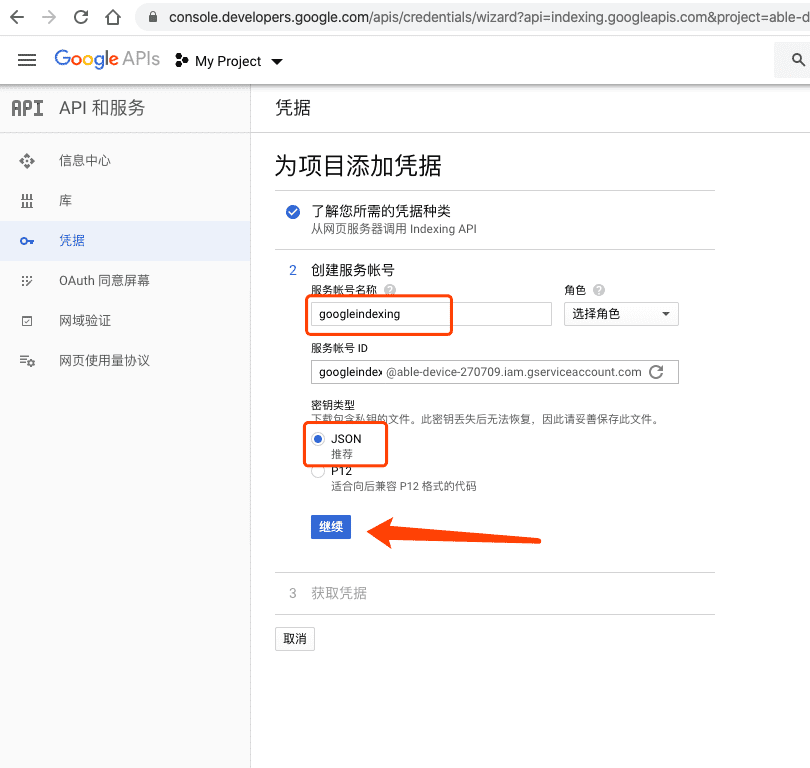
Choose to create an account with no role.
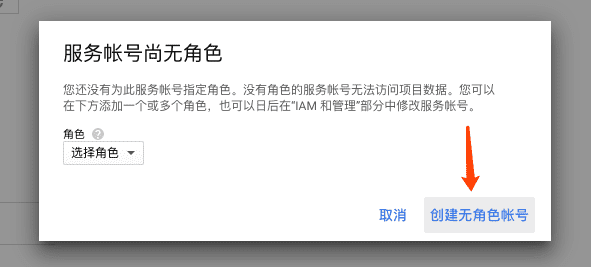
A JSON file will then be downloaded automatically; this is your private key, so keep it safe.
Verifying Site Ownership in Search Console
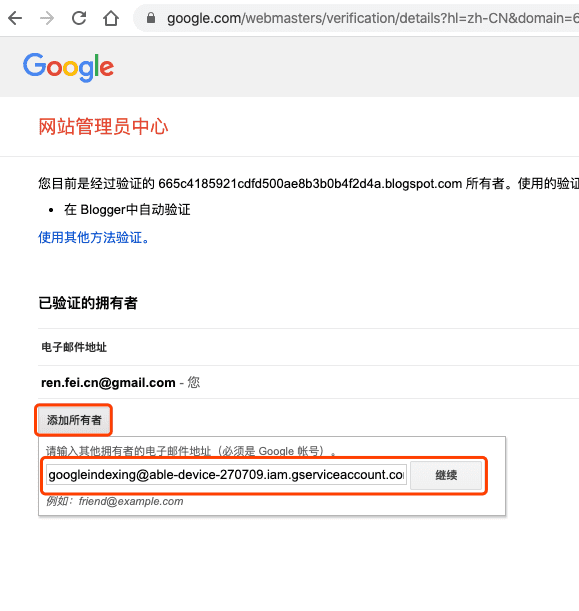
We also need to go to Search Console and add our site to verify ownership. After verification succeeds, note that we must go to the legacy console, not the new console! Then add an owner.
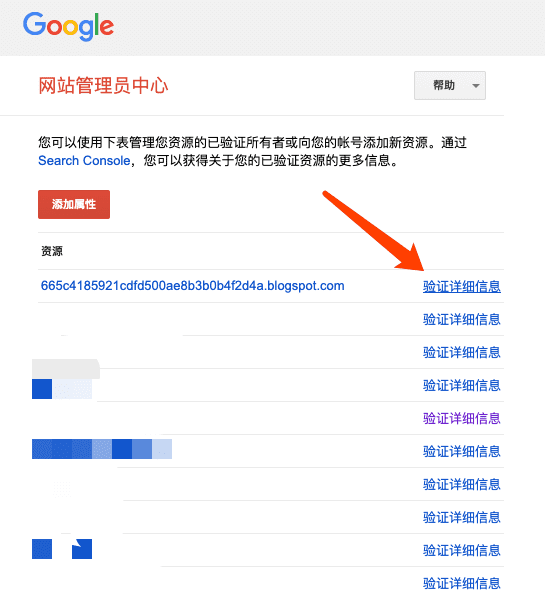
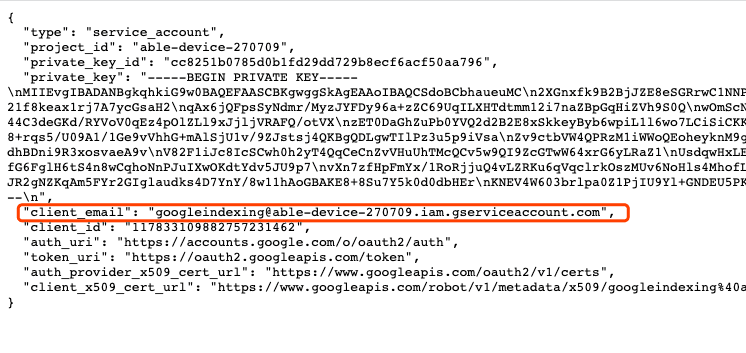
For the owner’s email, fill in the email address from the private-key JSON file we obtained in the previous step.
 =
=
Installing Dependencies in Your Project
If you use Apache Maven to manage your Java project, just add the corresponding dependency to your project’s pom.xml. Declare the following dependency in pom.xml:
<dependency>
    <groupId>net.renfei</groupId>
    <artifactId>googleindexing</artifactId>
    <version>1.0.0</version>
</dependency>
Write code to call the service. When instantiating GoogleIndexing, you need to pass a String parameter — the file path of the private-key JSON file:
import com.alibaba.fastjson.JSON;
import com.google.api.services.indexing.v3.model.UrlNotificationMetadata;
import net.renfei.googleindexing.GoogleIndexing;
import net.renfei.googleindexing.entity.UrlNotification;
import net.renfei.googleindexing.entity.UrlNotificationType;

public class Demo {
    public static void main(String[] args) {
        try {
            GoogleIndexing googleIndexing = new GoogleIndexing("/Users/renfei/Google/Ren-Fei-5a8df7c2b912.json");
            UrlNotification urlNotification = new UrlNotification();
            urlNotification.setUrl("https://www.renfei.net");
            urlNotification.setType(UrlNotificationType.URL_UPDATED);
            UrlNotificationMetadata urlNotificationMetadata = googleIndexing.publish(urlNotification);
            System.out.printf(JSON.toJSONString(urlNotificationMetadata));
        } catch (Exception ex) {
            ex.printStackTrace();
        }
    }
}
If more people use it later, I will also release a Baidu push tool.