
[This article is for Git beginners.]
A Brief Introduction to Git
Before using Git, a quick intro — many people think Git means GitHub, but they’re not the same thing.
First, Git. The story starts with Linux. How did Linux’s father, Linus Benedict Torvalds, manage Linux’s code? At first he used diff to compare code and merge manually. Why not CVS or SVN? They were paid software, against the Linux spirit. But as more people contributed and Linux grew, manual merging became impossible, so Linus chose a commercial version-control tool, BitKeeper, which BitMover authorized the Linux community to use for free. As the community grew, a few tried to crack BitKeeper, which enraged BitMover, who threatened to revoke the free license. The great Linus wasn’t one to mess with — in a fit of anger he spent two weeks writing a distributed version-control tool in C. That was Git! Linux’s code has been managed with Git ever since.
As for GitHub, it’s a website that builds a graphical management UI and some charts on top of Git, reachable by the whole internet, lowering Git’s learning curve. You can also star, make friends, and chat there — it’s an expanded version of Git, hosting tons of open source projects. But GitHub isn’t our主角 today; let’s keep learning Git.
Installing Git
On Linux, for Debian or Ubuntu, sudo apt-get install git installs Git in one line; on CentOS use sudo yum install git. Being open source, you can also download the source and compile it: get the source from the Git site, extract, enter the directory, then run ./config, make, sudo make install.
On macOS, you can install Git via Homebrew, or install Xcode from the App Store, which bundles Git.
On Windows, download the installer from the Git site and install with the default options.
Basic Git Project Setup
Git can be controlled with commands — common ones are git clone, git branch
First get the project’s Git URL — here using GitHub as an example; for an internal network it’d be an intranet address. E.g.: https://github.com/NeilRen/NEILREN4J.git
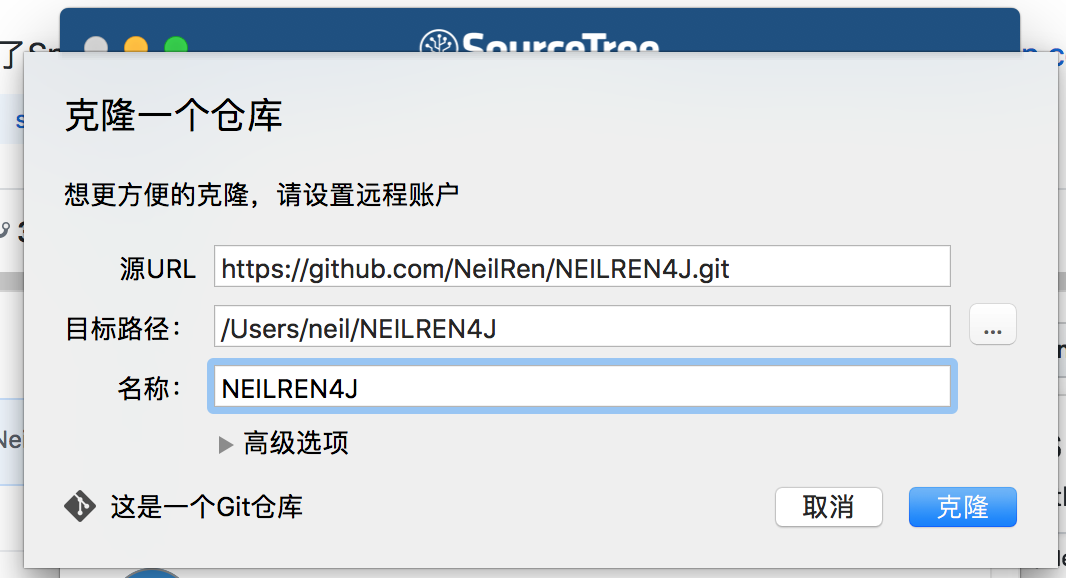
Launch SourceTree, choose New Repository → Clone from URL, which runs git clone https://github.com/NeilRen/NEILREN4J.git.
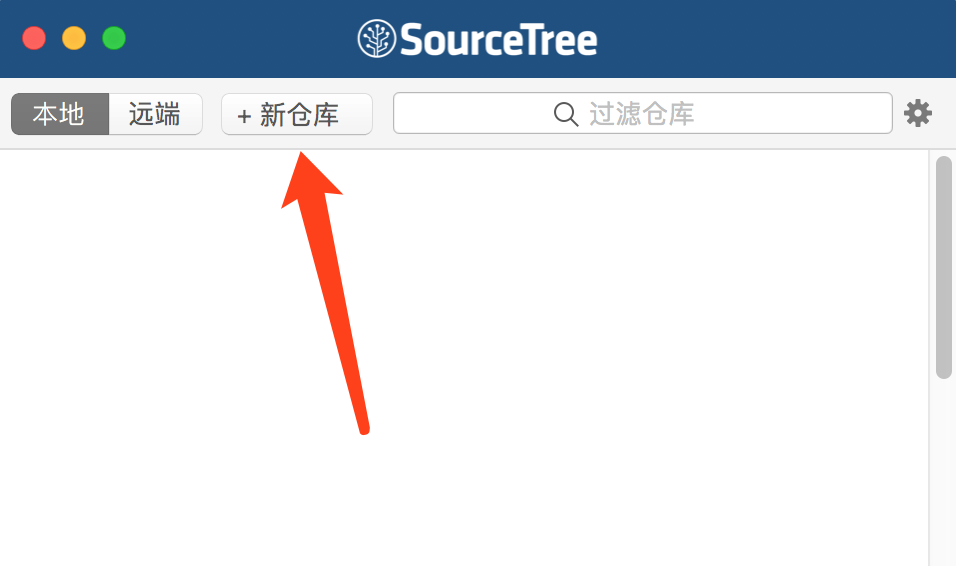
Then pick the local folder to clone into, click Clone, and wait.
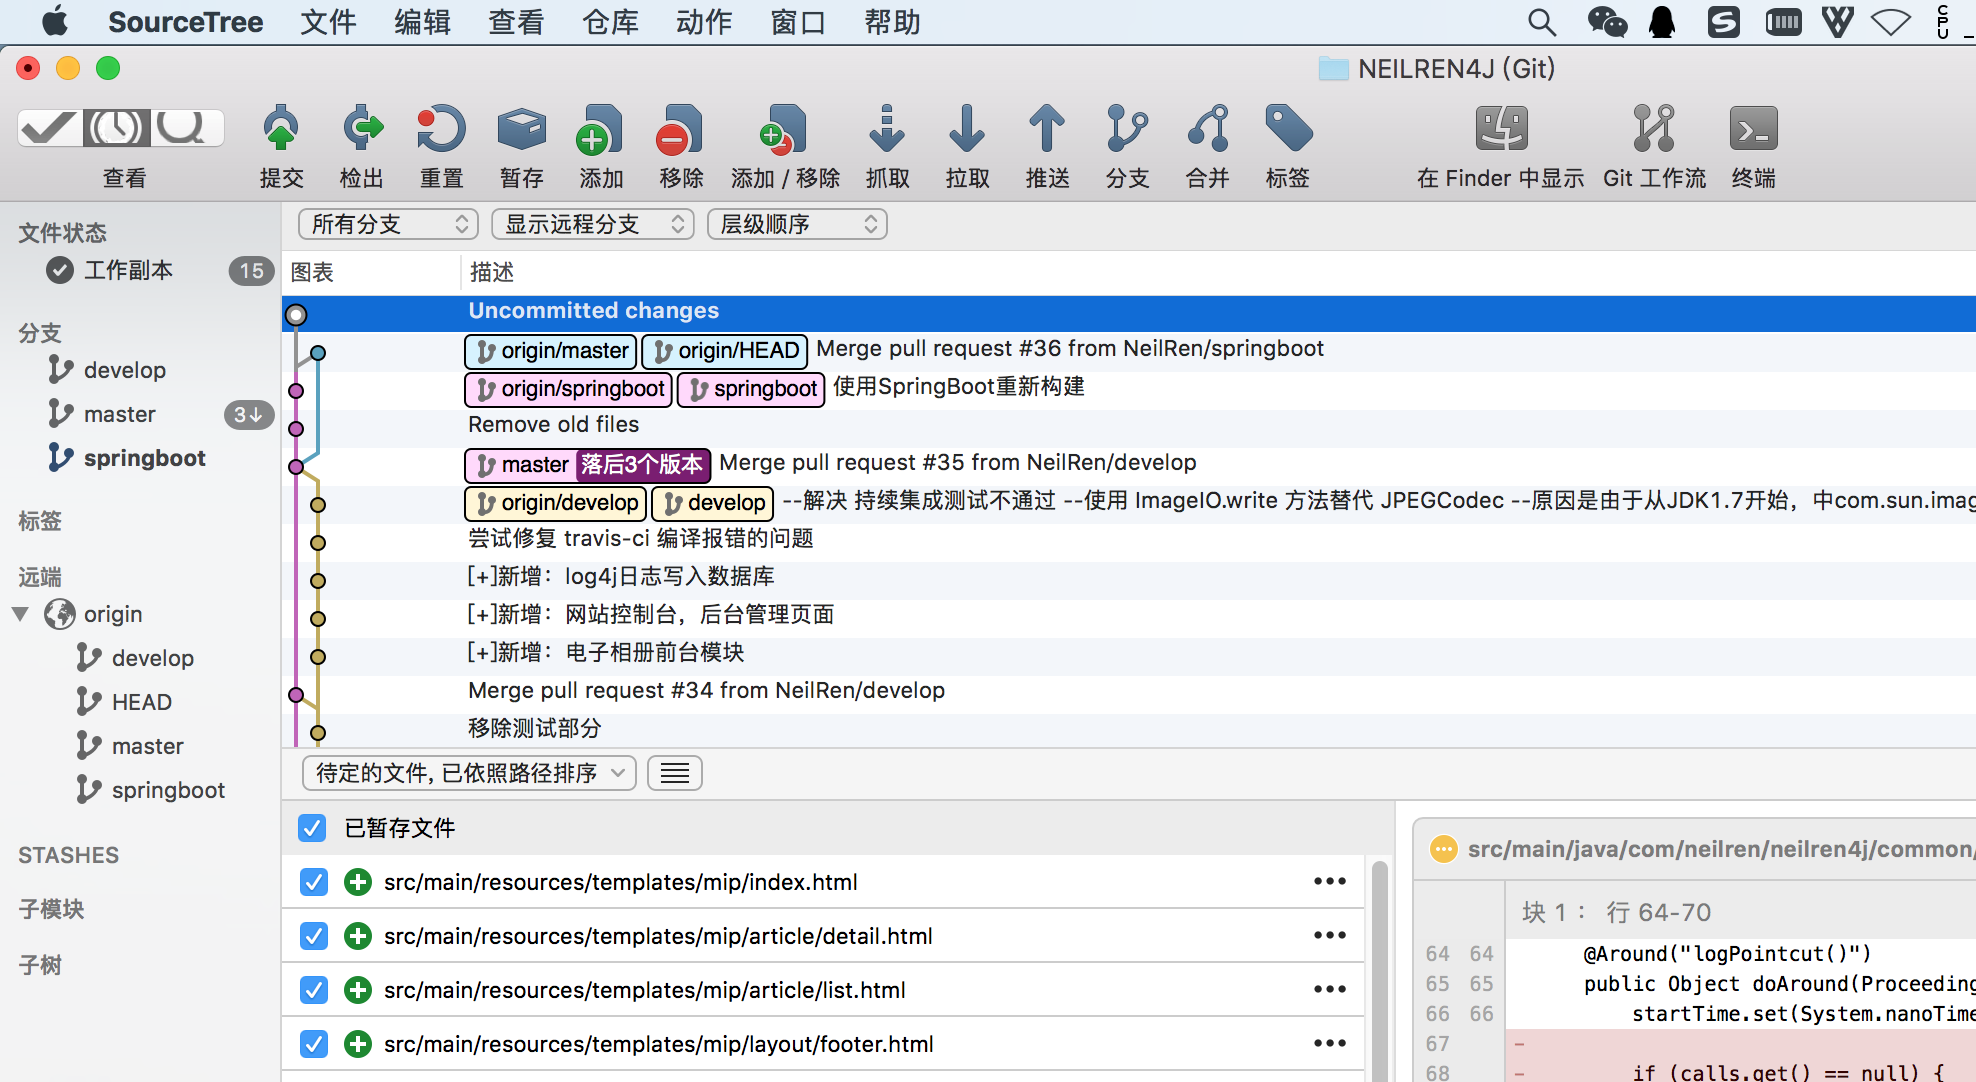
The left column shows local branches and branches on the remote server. Because Git is distributed, there’s no concept of a central node — anyone has a complete repo, so we’re equivalent to the remote; we can pull from remote and push to remote, and only pushed content is visible to others, just as only pulled content shows others’ commits. Double-click a branch name to switch branches. Note: when switching, the current branch can’t have uncommitted files — to switch you must either commit or discard your changes.
Common menu items: Commit, Pull, Push, Branch, Merge.
Commit is commit — but this commits to the local current branch, not the server; others can’t see your changes yet. Commit when you finish a small feature.
Push sends the local branch to the remote server (push), so others see your changes there. Push when you finish a task, to stay in sync.
Pull fetches a remote branch locally (pull), so you see others’ changes. Pull after you push, to stay synced.
Branch creates a new branch (branch). Everyone should work on their own branch, not affecting others. To bring others’ code into your branch, you merge.
Merge brings another branch’s content into the current branch (merge), also called fusion — fusing others’ code into yours. After fusion there may be conflicts; you then resolve them: if both edited the same spot in the same file, keep one or modify to be compatible, then mark the file resolved and commit. That resolves a conflict.
The GitFlow Workflow (Key Part)
The essence of Git is branch management. If everyone edits on the master branch, the project falls into chaos, so a workflow is needed to ensure normal development — the focus of this article. First, a simple diagram:
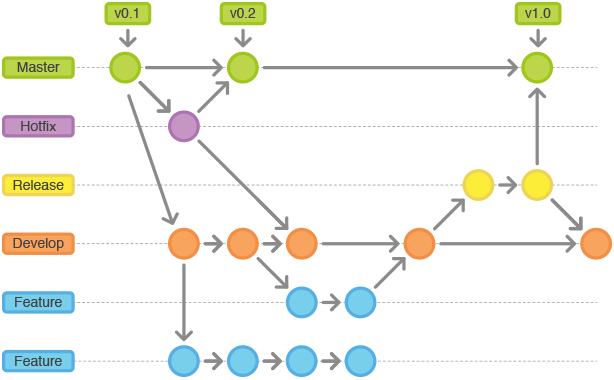
This diagram is only a recommended guide, not a 100% requirement. Adjust it to your team’s size and project; combine flows freely.
Master branch: the main branch, the ancestor of all branches, and everything eventually merges back to it. It should hold the most stable release version and be protected — nobody may push directly; the project lead manages it.
Develop branch: the development branch, where features are built. It holds the latest development code, for developers only, possibly untested. The tech lead manages it; nobody may push directly.
Feature branch: when a new feature is needed, create a Feature branch from Develop and develop on it. Since my team is small, I use this directly as each person’s personal working branch — e.g., I create renfei-working from Develop as my working branch, modify code there, and when a feature is done, request a merge into Develop.
Release branch: when the project hits a milestone and needs a release, create a Release branch from Develop for the release process — hand it to testers for functional and performance testing, etc.
Hotfix branch: the hotfix or maintenance branch. When the live production code has a vulnerability or bug to fix, create a Hotfix branch from Master and fix it quickly and precisely.
How Developers Work with the GitFlow Workflow
First pull the latest Develop branch, then create your own working branch (renfei-working) from Develop. Modify, commit, and push on your working branch. When a feature or task is done, request a merge into Develop; the tech lead reviews the code and, if fine, approves the merge into Develop. That feature’s development is done.
If someone committed in the meantime, how do I sync?
First pull the latest Develop branch, then fuse it into your working branch — bring Develop’s code into your working branch, resolving any conflicts.
Ignoring Unneeded Files
In a project, everyone’s dev environment differs and generates its own project files, which don’t need to be sent to others. To ignore them, use the .gitignore file.
.gitignore tells Git which files or folders to ignore, so it won’t track their changes. E.g., if you use IDEA, create a .gitignore in the project root with:
*/target *.iml /.idea *.class target/
This article is original by Ren Fei; please cite the source link when reposting.