
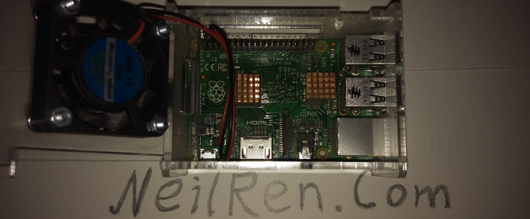
The Raspberry Pi was developed by the Raspberry Pi Foundation, a UK-registered charity, with Eben Upton as the project lead. In March 2012, Eben Epton of the University of Cambridge, UK, officially released the world’s smallest desktop computer, also known as a card-sized computer, only the size of a credit card but with all the basic functions of a computer — this is the Raspberry Pi board, translated into Chinese as “树莓派” (Raspberry Pi). The foundation aims to improve computer science education and related disciplines in schools and make computers fun. The foundation hopes this computer will see more applications developed and applied to more fields, both in developing and developed countries.
It is an ARM-based microcomputer motherboard that uses an SD card as memory and hard disk. Around the card-sized motherboard are two USB ports and one network port, which can connect a keyboard, mouse, and network cable, and it also has a TV output interface for analog video signals and an HDMI HD video output interface. All the above components are integrated on a single motherboard only slightly larger than a credit card, and it has all the basic functions of a PC — just connect a TV and a keyboard and it can run spreadsheets, word processing, games, play HD video, and many other functions. The Raspberry Pi B model only provides the computer board, with no memory, power supply, keyboard, case, or cables.
Just like any other desktop or laptop running a Linux system, you can do a lot with the Raspberry Pi. Of course, there are slight differences. Ordinary computer motherboards rely on a hard disk to store data, but the Raspberry Pi uses an SD card as the “hard disk”, and you can also connect an external USB hard disk. With the Raspberry Pi you can edit Office documents, browse the web, play games — even games that require a powerful graphics accelerator, like Quake.
The low price of the Raspberry Pi means its uses are more widespread; turning it into an excellent multimedia center is also a good choice. With the Raspberry Pi you can play video, and even power it through a TV’s USB port.
1. Raspberry Pi OS and Tools Download
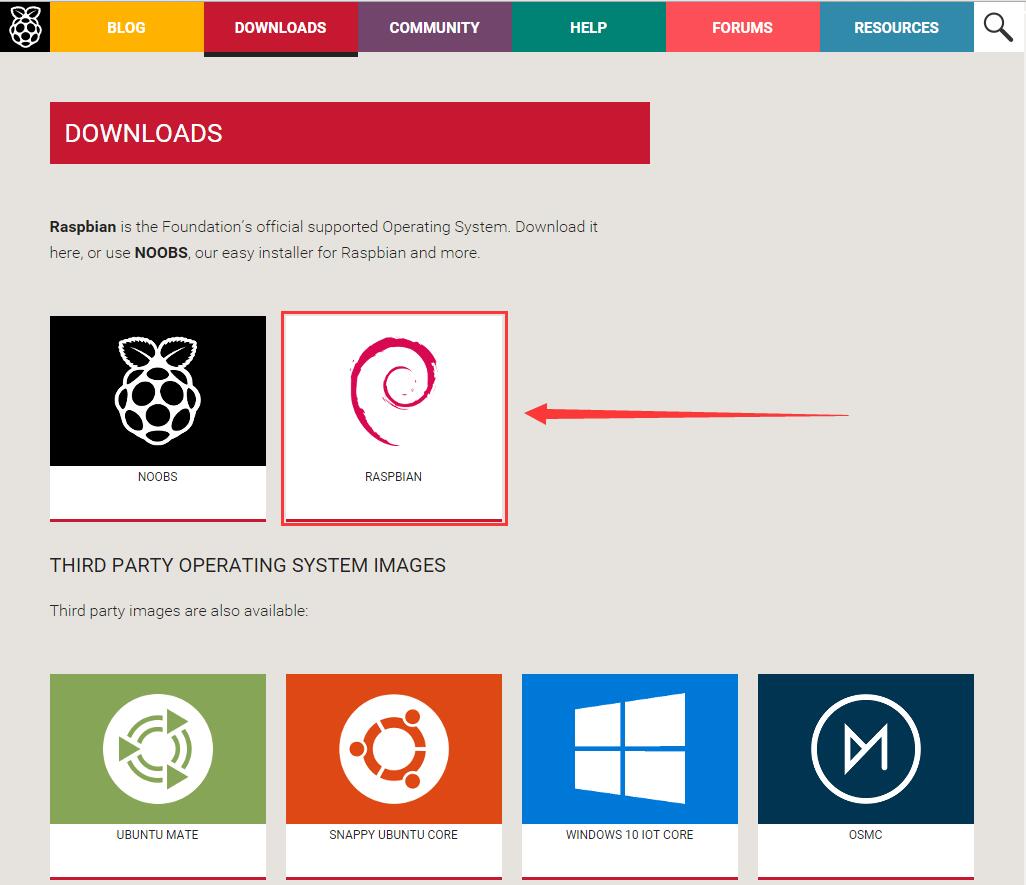
Raspberry Pi’s official [Raspbian] system download: http://www.raspberrypi.org/downloads
There are many OSes suitable for the Raspberry Pi, yet the foundation still designates the most compatible one for you to use. When the Raspberry Pi was born a year ago, the preferred OS was Fedora, specially tailored by Red Hat for the ARM processor; but after a few months Fedora fell out of favor and was replaced by Raspbian.
Raspbian is based on the Debian operating system. Two volunteers specifically optimized and ported Debian for the Raspberry Pi hardware. And Raspbian is not just an OS — it comes with 35,000 software packages and precompiled software. All this was done by two volunteers: Mike Thompson and Peter Green.
2. Burning and Installing the Raspberry Pi OS
Installing the system is essentially restoring from the official downloaded image. You need a TF card of 8GB or more; if money is no object, a 16GB TF card is definitely enough, because you may install large software like a database later. Under Windows you can use Win32 Disk Imager to restore the image, which is very convenient and is also the officially recommended method. Official download address: http://sourceforge.net/projects/win32diskimager/
Select the downloaded image file, then select the TF card’s drive letter, click “Write”, and wait. After writing is complete, you can safely remove the hardware and pull out the TF card. 
3. Accessing the Raspberry Pi via SSH
Insert the TF card into the Raspberry Pi, power it on, wait a few minutes, and you can connect in. First you need to know the Raspberry Pi’s IP address; you can go into the router to see the raspberry pi’s IP address. Then you need an SSH client; I use Xshell, but any SSH client works. The default username is: pi, the password is: raspberry. 
4. Enabling the Raspberry Pi ROOT Account
For convenience in tinkering, it’s recommended to enable the ROOT account right away. This is also simple — just run the following two commands:
// Set the root account password; you'll be asked to enter the new password twice
sudo passwd root

// Enable root account login
sudo passwd --unlock root
5. Expanding Available Space
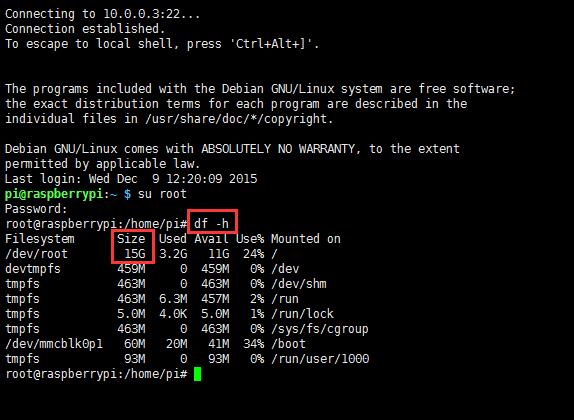
The first time you log in as root, the Raspberry Pi’s advanced settings panel pops up automatically (you can also enter it later via the raspi-config command), then select the first item, press Enter, wait a few seconds, a prompt pops up, press Enter again, then press the right arrow key to select Finish, and reboot, and the TF card’s full capacity will be recognized. 


Use the “df -h” command and you can see the TF card’s capacity is fully recognized:
6. Replacing with a Domestic Software Source and Updating the System
The Raspberry Pi’s servers are abroad and slow, so we can choose a domestic mirror site. The Raspberry Pi official provides a mirror list: http://www.raspbian.org/RaspbianMirrors I found a few domestic mirrors in it; after several attempts, the one from University of Science and Technology of China (USTC) was very fast — let’s switch to USTC. Mirror homepage: https://lug.ustc.edu.cn/wiki/mirrors/help/raspbian Let’s edit the /etc/apt/sources.list file. I recommend editing with the nano command; no need to bother with VIM. The command is:
// Edit the software source list
nano /etc/apt/sources.list
Then use Ctrl+O, then Enter, to save, then press Ctrl+X to close and exit. 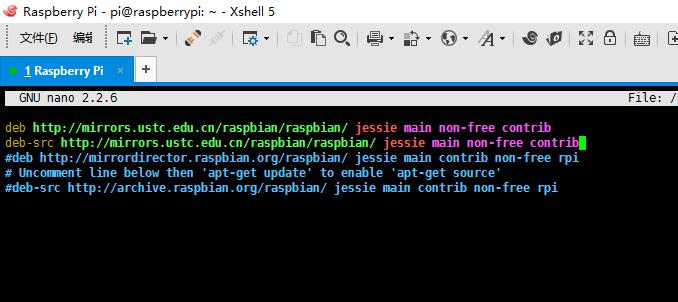
Then use the apt-get update command to update the system. 
7. Setting a Static IP Address
Going back to point two mentioned earlier, the problem of not knowing the IP address — we need to set a static IP for the Raspberry Pi, so we don’t have to find the machine again when the IP changes. Still use nano to edit the network interface file:
// Edit the IP address
nano /etc/network/interfaces

// Then edit the following
iface eth0 inet static
address 10.0.0.3 # the static IP address to set
netmask 255.255.255.0 # network mask
gateway 10.0.0.1    # gateway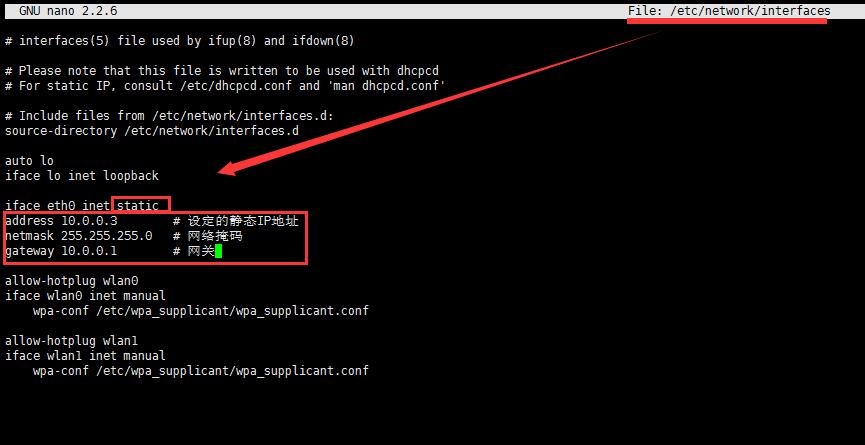
8. Installing the Remote Desktop Software xrdp
For beginners, using the command line may be painful, so let me introduce the remote desktop, so you can operate with a graphical interface. The remote desktop software is xrdp, installed with apt-get install xrdp. 
9. Logging into the Raspberry Pi via Remote Desktop
We use Windows’ Remote Desktop Connection: Run ==> mstsc ==> Enter, enter the Raspberry Pi’s IP address, connect, then enter the Raspberry Pi’s account and password. 

