

This post demonstrates on the JH GitLab SaaS platform, but it applies to any self-hosted GitLab too. JH GitLab SaaS gives me high availability, so I never self-hosted GitLab itself.
Why Bring a Runner Home
If you found this article, you’re probably a tech enthusiast or a geek. DevOps has become standard these days — every project needs automation — and running automated operations on GitLab is inseparable from the Runner that executes them. So why did I bring a JH GitLab Runner home? Roughly these reasons:
- JH GitLab SaaS shared Runners have execution time quotas. Once you blow past the free allowance, the fun stops — unless you buy more time. Running a private Runner at home means spending freely.
- JH’s Runners live in mainland China and are subject to international network restrictions. Lots of dependency packages and images have to be downloaded from overseas, and cross-border traffic is often slow or fails. Run the Runner at my place, though, and the router already has certain “you-know-what” settings, so cross-border networking isn’t an issue.
- Security of sensitive content. If your program needs passwords, keys, private data, sensitive material, sharing a Runner makes me uneasy — always worrying about leakage. Your own private Runner keeps sensitive data at home.
- As a geek you surely have a small datacenter of your own at home. Self-built machines are cheap and usually overpowered; hardware sits idle anyway, residential electricity isn’t expensive, and adding a few VMs to run Runners costs very little.
- Finally, as a geek you surely love tinkering. Having your own dedicated Runner is cool, you can configure performance and networking freely, and tinkering is its own reward — once you understand how it runs, you can go help others in the community.
Environment and Prerequisites
Since this post is about GitLab Runner specifically, I won’t expand on other topics. I assume you already have the following:
- Basic knowledge of Linux and Docker, comfortable on the command line.
- An account on JH GitLab SaaS or a self-hosted GitLab platform.
- Basic knowledge of writing
.gitlab-ci.ymlscripts. - A Linux host or VM with internet access and the Docker engine installed.
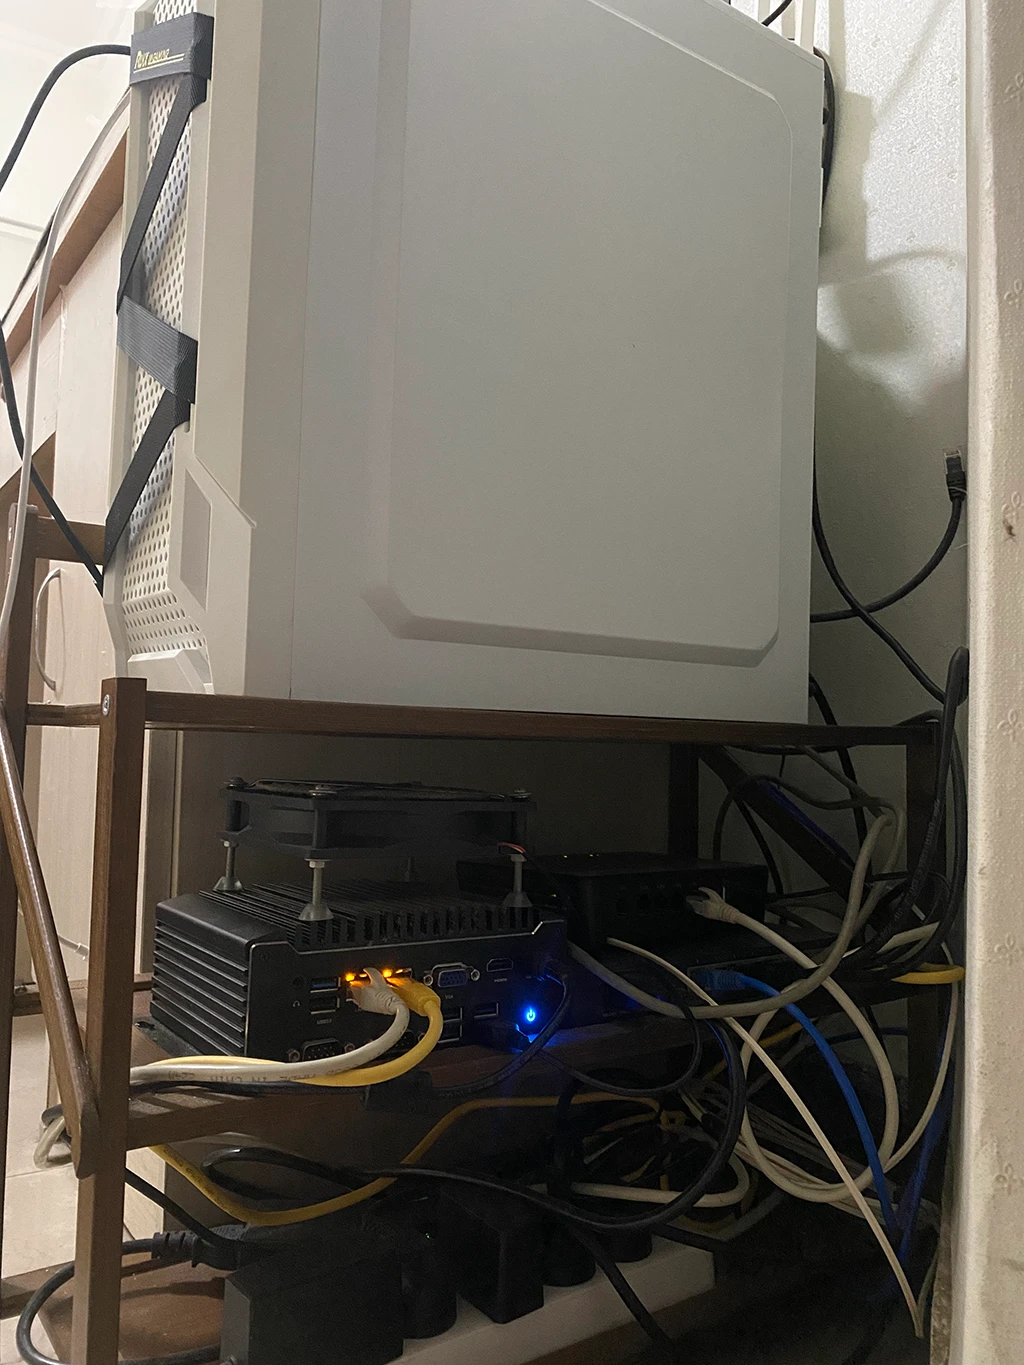
My hardware setup: a physical PC at home, Ubuntu VMs created via VMware ESXi, Docker engine installed inside the VMs, so VM resources can be tuned quickly.
My network setup: the PC connects to a gigabit switch, through a soft router running OpenWRT, to the ISP’s optical modem and fiber out of the house — 300 Mbps down, 35 Mbps up — plus some “you-know-what” configuration on the soft router to handle cross-border networking.
Everyone’s environment differs, so enough said. If you don’t have the prerequisites above, prepare your environment first.
Creating a Repository
First create your own repository on JH GitLab SaaS. Even if you have one, I recommend making a fresh one to practice and get familiar — go to your real repository once you’ve got it. Mine is here: https://jihulab.com/renfei/jihulab-runner-example
Then go to Settings -> CI/CD -> Runners and note down the registration URL and Token:
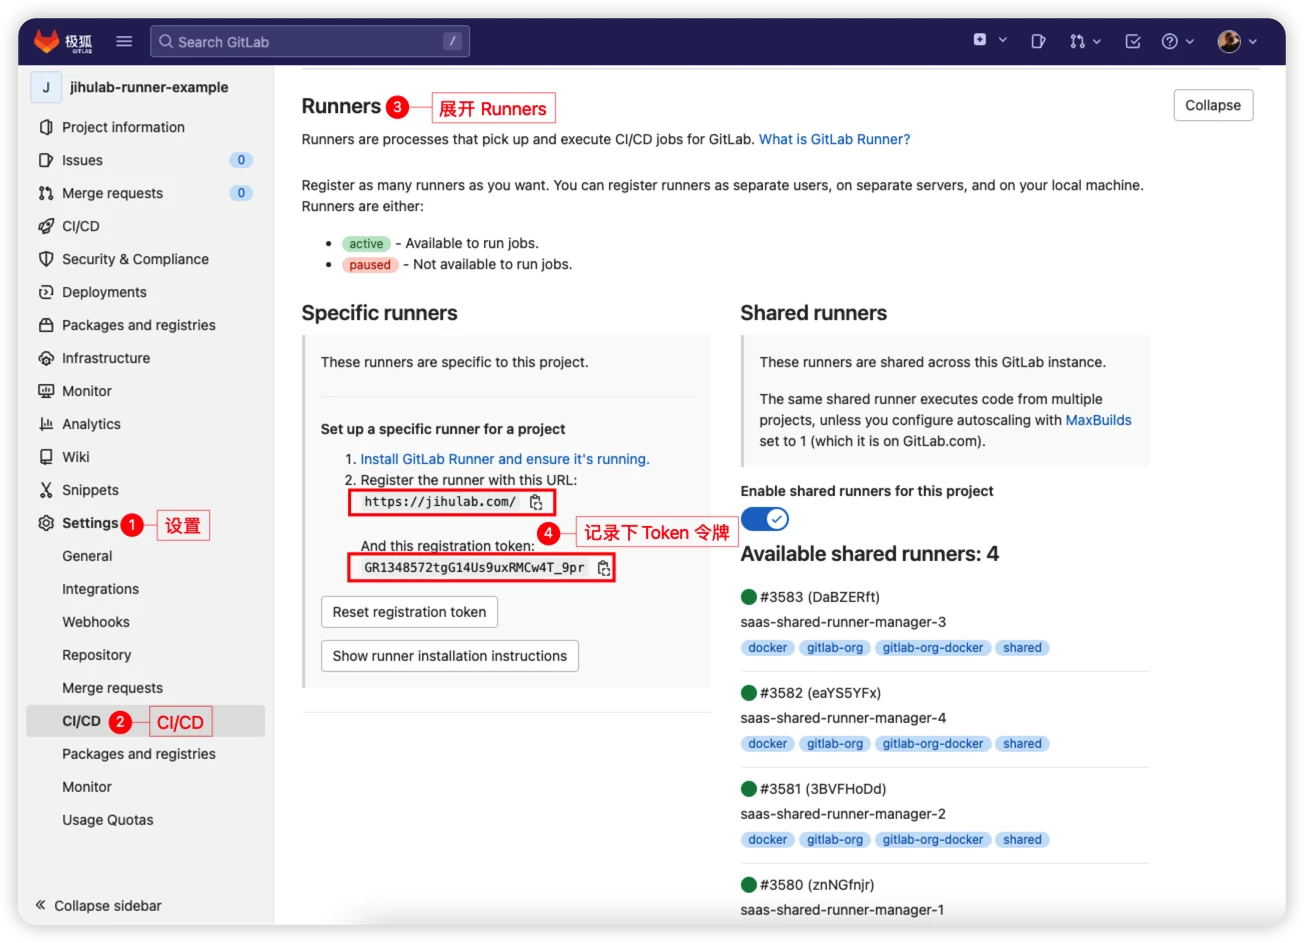
We get the registration URL https://jihulab.com/ and Token GR1348572tgG14Us9uxRMCw4T_9pr. Keep your token private! Otherwise others can register a Runner against your repository, and once CI/CD runs, that Runner gets your code!
Installing the Runner
Log in and pull the Runner image. This step is slow — if your network is poor, go make tea after launching it:
docker pull gitlab/gitlab-runner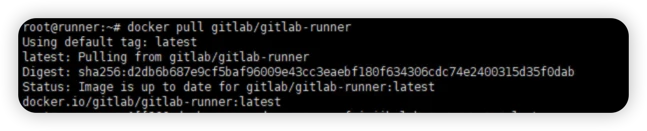
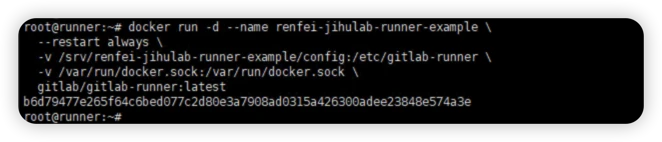
You can append a version tag to pin a version; I always take the default latest. Then run a container:
docker run -d --name renfei-jihulab-runner-example \
  --restart always \
  -v /srv/renfei-jihulab-runner-example/config:/etc/gitlab-runner \
  -v /var/run/docker.sock:/var/run/docker.sock \
  gitlab/gitlab-runner:latest
Briefly: -d runs in the background, --name names it, -v mounts a directory (volumes work too, not demonstrated here). Note /srv/renfei-jihulab-runner-example/config — that mounts the config directory onto the host, so if you run multiple containers these directories must be distinct! Jot this path down; we’ll need it shortly.
Registering the Runner
We started a container above; now let’s register this Runner to the repository on JH GitLab SaaS. Remember the Token? Time to use it:
docker run --rm -it \
  -v /srv/renfei-jihulab-runner-example/config:/etc/gitlab-runner \
  gitlab/gitlab-runner register
Note the -v parameter matches the directory from the run command above. Then this interactive registration flow starts:
# The original English interaction is as follows
Enter the GitLab instance URL (for example, https://gitlab.com/):
https://jihulab.com/
Enter the registration token:
GR1348572tgG14Us9uxRMCw4T_9pr
Enter a description for the runner:
[aa616f1b9146]: renfei jihulab runner example
Enter tags for the runner (comma-separated):
renfei-jihulab-runner-example
Registering runner... succeeded                     runner=GR134894
Enter an executor: parallels, shell, virtualbox, docker+machine, docker-ssh+machine, docker, docker-ssh, ssh, kubernetes, custom:
docker
Enter the default Docker image (for example, ruby:2.6):
ubuntu:latest
Runner registered successfully. Feel free to start it, but if it's running already the config should be automatically reloaded!

# The Chinese translation of the interaction is as follows:
输入GitLab实例URL(例如,https://gitlab.com/):
https://jihulab.com/
输入注册令牌:
GR1348572tgG14Us9uxRMCw4T_9pr
输入跑步者的描述:
[aa616f1b9146]:renfei jihulab runner example
输入runner的标签(逗号分隔):
renfei-jihulab-runner-example
正在注册runner…成功                     runner=GR134894
输入执行器:parallels, shell, virtualbox, docker+machine, docker-ssh+machine, docker, docker-ssh, ssh, kubernetes, custom:
docker
输入默认Docker镜像(例如,ruby:2.6):
ubuntu:latest
Runner注册成功。可以随时启动它,但如果它已经在运行,配置应该会自动重新加载!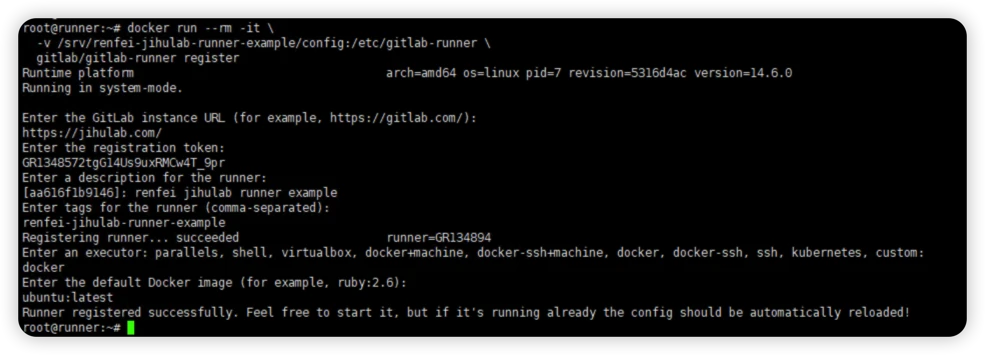
Watch out for the “tags for the runner” setting — pick it carefully, because we’ll use it constantly later to identify this runner.
Then go back to Settings -> CI/CD -> Runners and refresh. There it is!
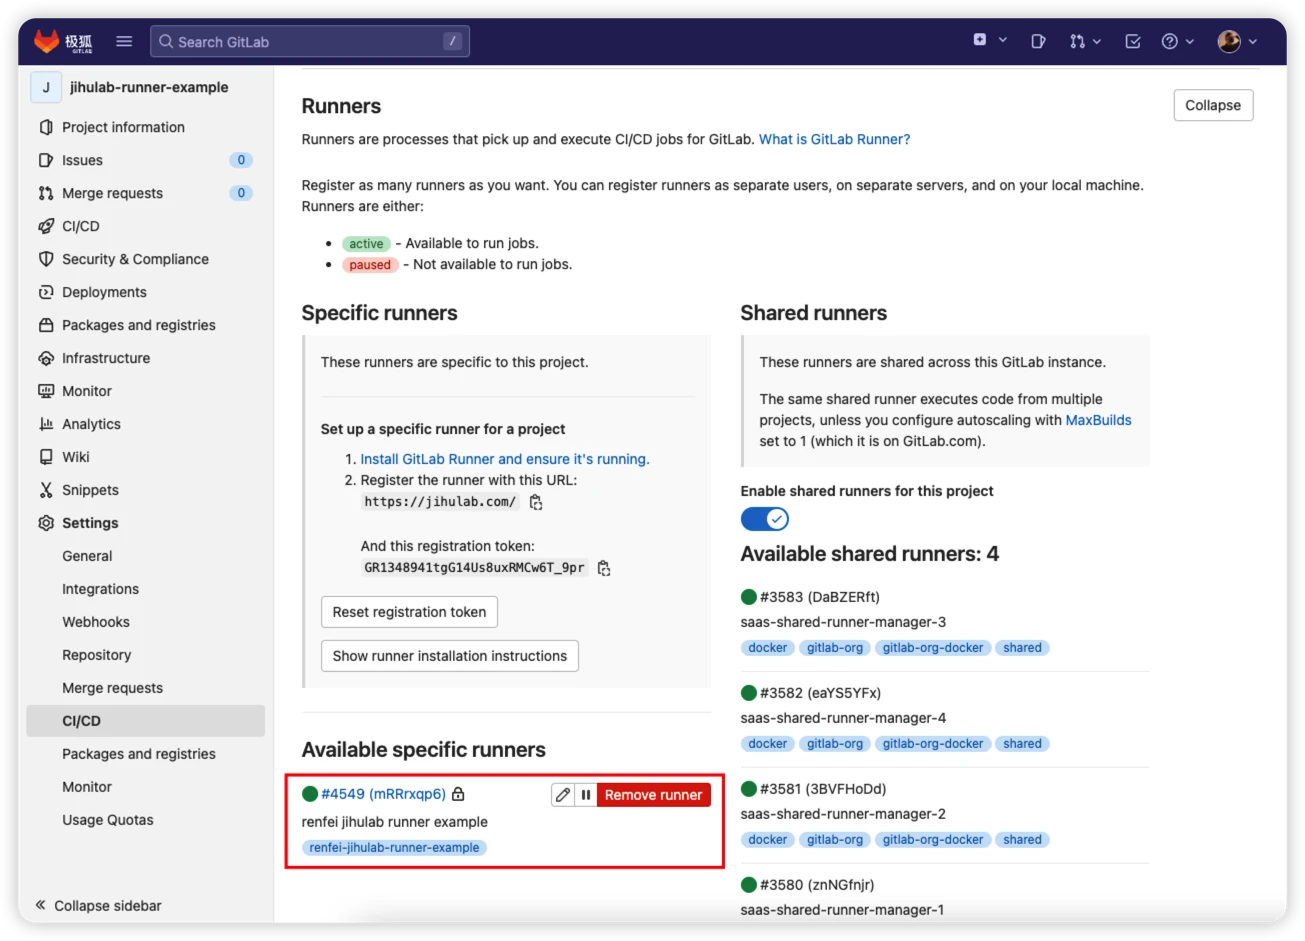
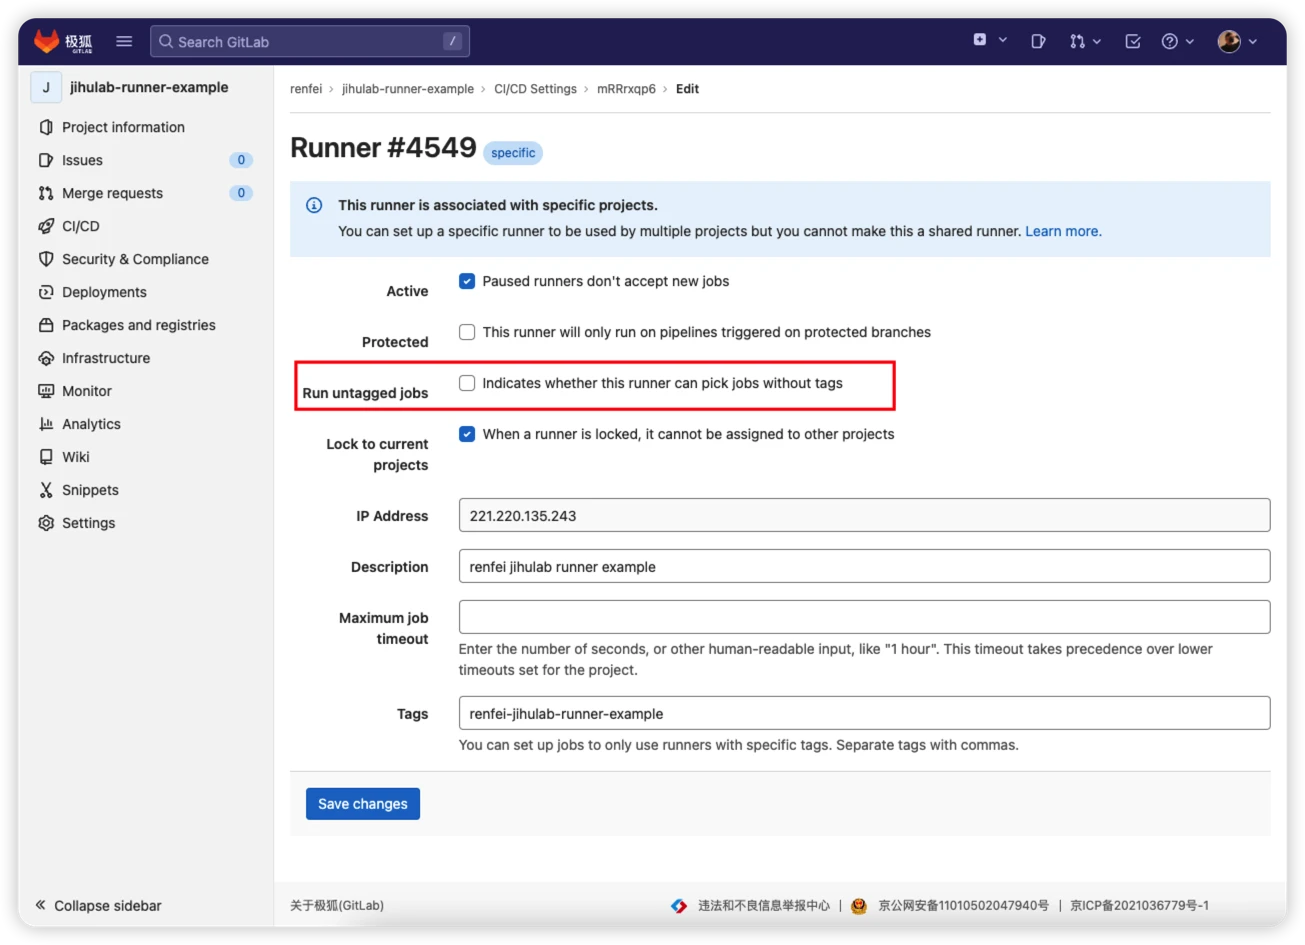
Right now this Runner must be referenced by tag in .gitlab-ci.yml. If you want it to work even without tags, click Edit and check: Indicates whether this runner can pick jobs without tags.
I won’t check it, because later I’ll specify the tag in .gitlab-ci.yml to use my own dedicated runner.
Using Your Dedicated Runner in a Project
Create a .gitlab-ci.yml in the repository, remembering to set tags in each job to our runner’s tag:
image: busybox:latest

before_script:
  - echo "Before script section"
  - echo "For example you might run an update here or install a build dependency"
  - echo "Or perhaps you might print out some debugging details"

after_script:
  - echo "After script section"
  - echo "For example you might do some cleanup here"

build1:
  stage: build
  tags:
    - renfei-jihulab-runner-example
  script:
    - echo "Do your build here"

test1:
  stage: test
  tags:
    - renfei-jihulab-runner-example
  script:
    - echo "Do a test here"
    - echo "For example run a test suite"

test2:
  stage: test
  tags:
    - renfei-jihulab-runner-example
  script:
    - echo "Do another parallel test here"
    - echo "For example run a lint test"

deploy1:
  stage: deploy
  tags:
    - renfei-jihulab-runner-example
  script:
    - echo "Do your deploy here"
Commit and push to JH GitLab SaaS, then check the pipeline: https://jihulab.com/renfei/jihulab-runner-example/-/pipelines/529692. Yep, it ran through:
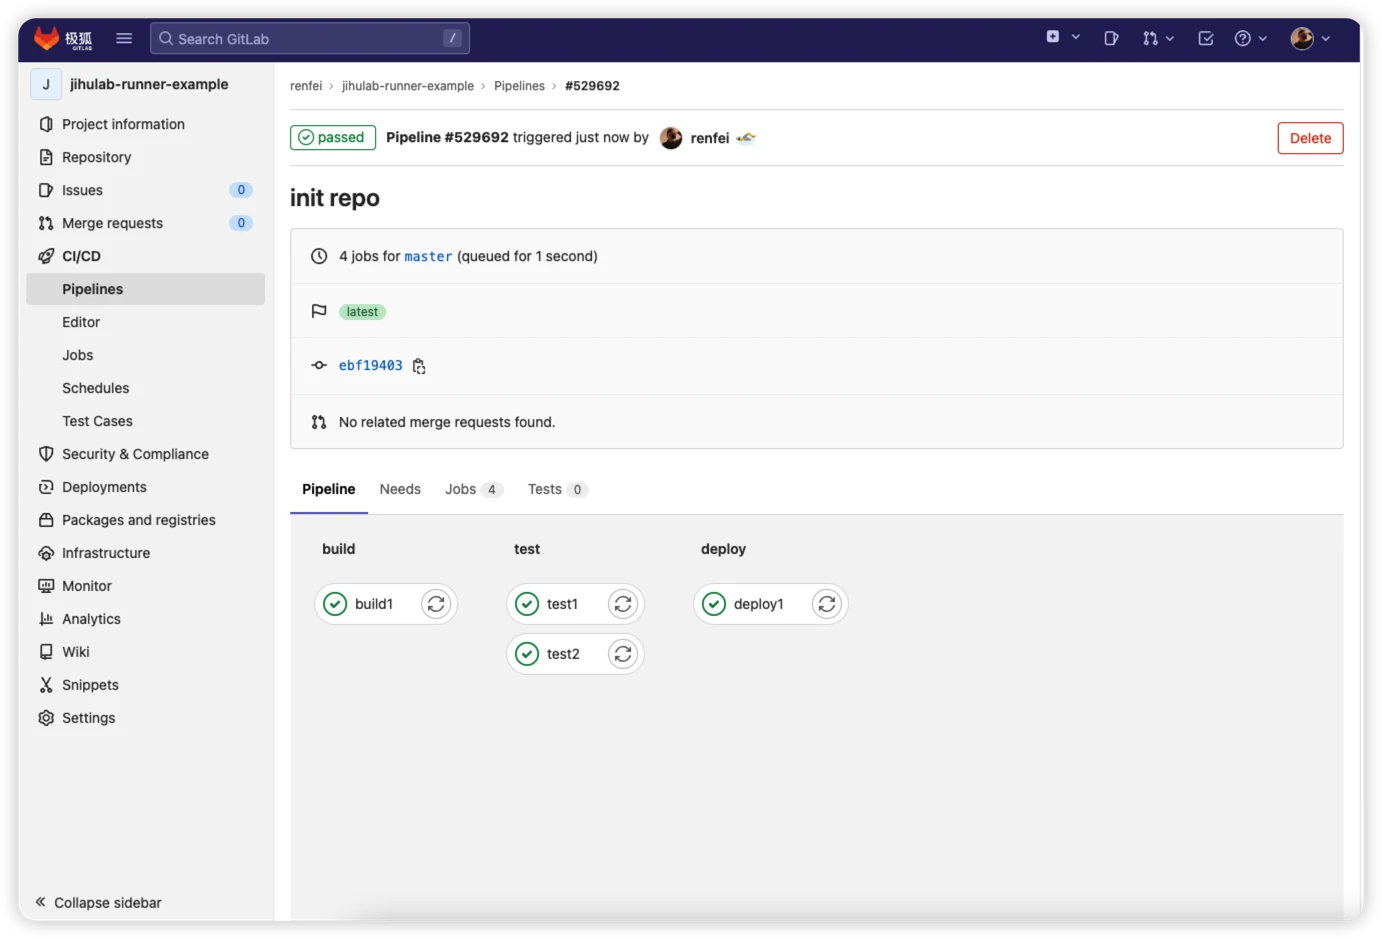
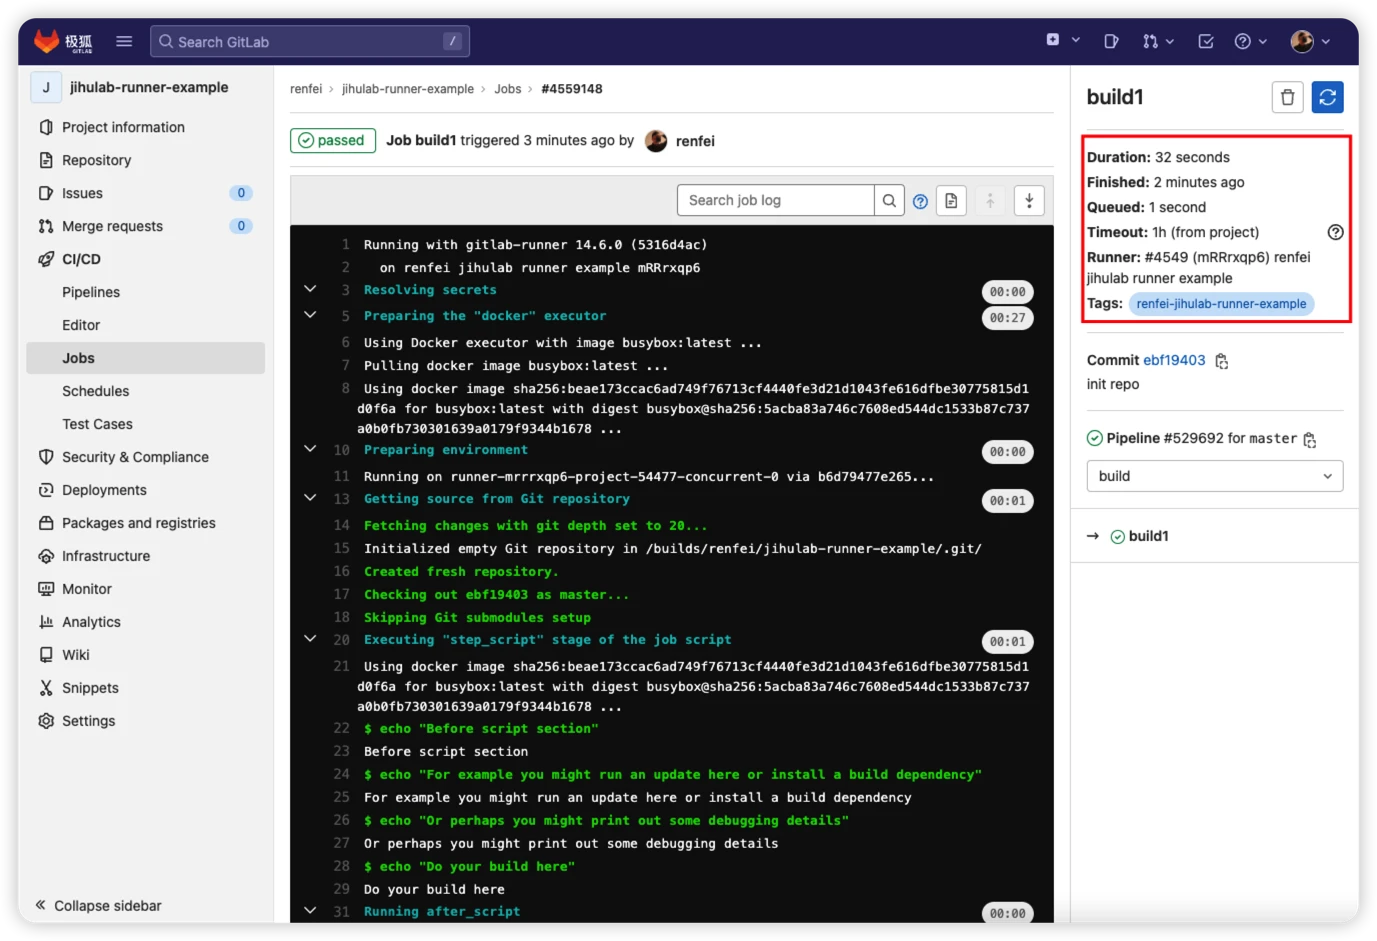
Open a specific job: https://jihulab.com/renfei/jihulab-runner-example/-/jobs/4559148. The right side already shows it was executed by my own private runner:
That’s it. Happy tinkering, geeks. One more thing: this post is entered in the JH GitLab JIHULAB 101 creator camp — please vote for me!
This article was originally written by Ren Fei. Non-commercial reprints must credit the source and author; for commercial reprints contact the author for permission.